Sunday, September 10, 2017

Operations Session Script 1

The yard tends to be the first area to bottleneck during a quarterly operations session and it usually takes the operators some time to come up to speed (i.e. remembering what they are supposed to be doing) so I figured I would jump start the process and script the first moves for this month’s session.


The spreadsheet’s summary looks like gobbledygook, so I’ve added pictures to illustrate the moves. The process takes 2 yard operating in concert to be efficient.


The first yard operator (Op1) positions  yard switcher (SW1) on the inbound/outbound yard lead (I/O) into the yard and then retrieves the Philadelphia Transfer Freight (loads and needed empties from Philly to Camden, NJ) from staging and crosses over from the second main to the first main.


The second yard operator (Op2) takes another yard switcher (SW2) and retrieves the cars going back to Philly from yard track 5 and pulls them out to yard lead 1.


Op1 drops the cabin and separates from the inbound train, proceeds over the crossover from mainline 1 (ML1) to mainline 2 (ML2), reverses direction and positions itself on ML2 just beyond its cabin (still on ML1).


Op2/SW2 has now shoved the Philly outbound cars to SW1 on the I/O lead, separates and backs away

Op1/SW1 pulls the outbound cars from the I/O lead across to ML2, reverses direction and pushes them to the Philly engine.


Op1/SW1 reverses and goes to ML1 to retrieve the inbound cars, couples, reverses past inbound yard lead switch. Reverses and shoves the cars to Op2/SW2 on the I/O lead.


Op1/SW1 goes back to ML1 to retrieve PRR cabin and places it on the end of the outbound Philly Transfer which then heads into staging.


Meanwhile Op2/SW2 takes the inbound cars and begins blocking them into locals
The 5th & 6th cars need to be blocked into the Deepwater local (WY841) on yard track 3.
Add a cabin and move the train to the I/O lead.

Op1/SW1 places the WY841 on ML2.
Engines are added, the train dispatched, and Red oak tower notified.

While Op2/SW2 blocks the other locals .

The last car is blocked into the Salem local (WY51).

Meanwhile Op1 has retrieved the Deepwater Coal drag from staging (Reading RR engines and caboose) and dispatched it past the Pavonia yard contacting Red Oak tower for handoff.


Op2/SW2 pulls the WY842 hopper empties from yard track 7 and moves them to the I/O lead preparing to turn the WY843/WY842 coal drag on the Deepwater end. Switching the loads for empties is a similar process to the Philly transfer operations.

Now the "only things left" to handle are the next 4 turns (Millville Sand Hog (WY33/34), Millville local (WY27/26), Salem local (WY51/50), and the Tank Sweeper (WY79/80). Listen to the dispatcher!. ðŸ˜‰

Wednesday, September 6, 2017

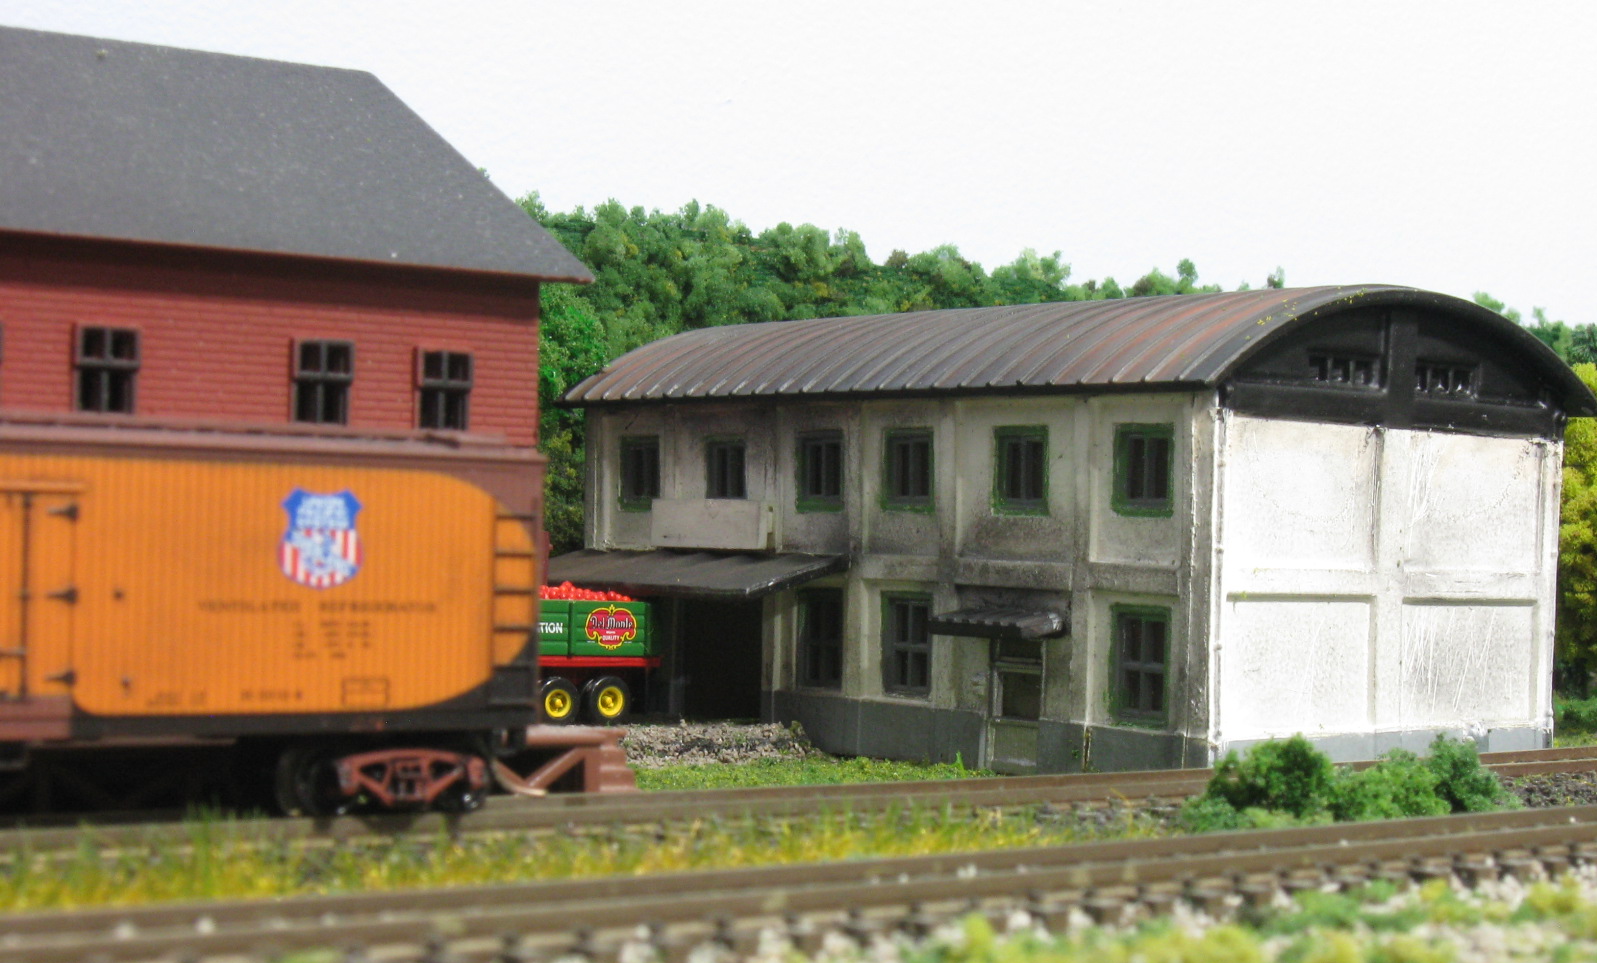
DelMonte Distributors Building Complex

Well, I have done it again. I touched a paint can (multiples in fact) and to make it even worse, I got out the weathering pastels again. There were 2 buildings on the layout that were on my to-do list that I wanted to change and both required white paint. I had gotten a can of flat white modelers paint for the projects and already had a can of flat black.

I used an old, old, way “too common”, Revell/Heljan DelRay Foundry (or bakery) building to stand in for a Del Monte Distributors market on Olive Street in Westville. Since the real building was white, here was project number one. Change the appearance of the Revel Bakery and hopeful mask its heritage and match the prototype buildings color. Great idea, right?

Revell/Heljan building at a previous layout location


I had already changed the buildings “give away” signs (Alaskan Travel & Shell Oil) to 2 Del Monte advertisements.

Problem #1:  12 windows and 4 doors to mask.  We were asking for trouble right off the bat.

Following sloppy masking, the white spray paint went on fairly well. The building indeed looked different. But then I decided to weather it with Doc O’Brien’s grimy black weathering powder. I thought you were supposed to be able to blow/wash away the powder if you didn’t like the outcome but I must not have waited long enough for the paint to fully dry. It went on and permanently stuck way more than I desired. Suddenly white is almost black. Lost the main benefit of the color change!


For the second building I was trying to get the effect of an existing line side Westville building. Originally it was Mid-Atlantic Lumber. It now exists on my layout as part of the DelMonte complex.

Nineteen windows, 4 doors, and multiple roofs! I masked it and painted the white portion. The building was ready for me to repaint the top story and roofs to get the effect I wanted. I re-masked it, grabbed the next spray can and went to work. It went on fairly well. Now remember my previous blogs about:
1) You don’t let Rick touch the paint; and
2) Rick is color blind?

When the paint was drying I noticed the roof looked suspiciously like the roof brown spray I use to weather my tracks and it was. I guess that is why I should actually read the paint color name on the can. Oh well, another coat and this time I used the flat black.


Another round of fighting with weathering pastels and I was done. Neither job turned out as planned but I at least met my goal of incremental improvements. (And maybe next time I’ll read the can name - but you can’t really count on that.)


Wednesday, August 23, 2017

Weathering the RDCs

Leaving Rick alone with pastels is almost as bad as giving him paint!

Last year when I posted an RDC picture on the PRSL Historical Society site I got told that the RDCs were delivered with a dark blue undercarriage, not black (as if I could tell the difference). So today I pulled out the weathering powders and attempted to put a blur tinge to the black undercarriage. I cannot tell the difference in person but the camera picks up the blue (too light of a blue).

While I was at it I also added a grimy black to the fluting and darkened the fans on the ConCor units.


Monday, August 14, 2017

What do you do with a 90’ tree?

I have come to the conclusion that what trees look good to you depends on the area of the country you live in. I have seen folks rave about trees made from weeds and to me they still look like weeds with something stuck on them. But then I am from the Middle Atlantic region and when I look at a forested hillside I don’t see any branches I just see foliage. When I look up my street I see no branches, just the foliage. Therefore, anywhere other than up front, puff balls seems to do a better representation in my eyes (we are just talking my opinion here).  To other areas of the county I am sure the opposite choices are more appropriate

Wanting to experience it for myself, I figured I would try the other side of the fence. I got a Scenic Express starter set and went to work. Never again! Way too much work and mess! When I was done I had 30 larger trees and 30 low pieces I may be able to “plant” in other places. (Although I followed all the included instructions, I think spray painting the tree trunks would be better.)

I had a couple of 90’ trees. Where do you put a 90’ tree on an N scale layout without it looking out of place? (I trimmed it down to ~70’.)

The second issue I have with these trees is that in spite of extra long soakings and follow-up spritzing with matte medium, they are still fragile. I have a 12’x17’ layout that was designed for operations and it is relatively high (54”) so there is no way they will survive being in areas where the operators have to  manually throw Peco sprung switches (and there are 50+ of them on the layout). That in turn means they will have to be positioned father back on the layout (which sort of defeats the reason you go to all that trouble in the first place).

P.S. I still want to try one of M.C.’s wire oak trees. I am sure they will outlast any operator’s arm! J


Friday, August 11, 2017

Don't Let Rick Touch the Paint!

Although I can muck along and complete a lot of different types of projects, there are certain things you should not let me touch. Paint is one of those things.

Micro-Mark had a sale on Doc O'Brien's Weathering Powders and that sounded like a great idea. After all, you can wash powders off if you don't like the effect. How much trouble could I really get into especially with colors like "muddy red", "grimy black", and "grungy gray". There was one problem though - I am red-green colorblind!

Previously I had dulled all my equipment by grinding up charcoal and using it to remove the shine on the freight cars. It worked pretty well but didn't exactly stick really good. Doc's powders stick a little better but it is hard to get a grip on smooth plastic, especially the trucks. I found that if you add a little water the pigments become paint and stick to the trucks pretty well and the curved steam engines.

Sending photos to my operators, I learned that some of the trucks were too red and I will have to tone them down, I will find out during our September Op Session how the other efforts fared.  All the hopper and gondolas have been worked on and practically all the trucks. I need to get some pictures on how old tank cars weathered to do them.


Thursday, August 10, 2017

Masonary Work & New Friends

I decided to finally get around to put some masonary walls into some long bare locations. (I did have some issues where clearance spaces were compromised.)

I used a Chooch peel & stick "8260 Small Cut Stone Wall" (and still need to do some trimming). Here are some before and after photos:


I managed to hook up with a new friend from England. He was looking for an NS Southern heritage locomotive and I am in desperate need of thinning my collection (anyone for an extra 200 MicroTrain freight cars?  :-) ).

Andy also has a You Tube channel on his Montrose & Highland Railroad (39 episodes). It is fascinating to watch a railroad go from its early stages to finishing touches.